BeScan Lab Laboratory Tips: Small Meniscus, Big Impact
2025-10-22BeScan Lab
BeScan Lab Laboratory Tips: Small Meniscus, Big Impact
Have you ever noticed inconsistencies between replicate samples when using BeScan Lab for stability analysis? Or wondered if small signal variations might be caused by something other than your sample? The answer could lie in that small curved surface—the meniscus—inside your sample vial.
Based on Static Multiple Light Scattering (SMLS) technology, BeScan Lab detects instability phenomena like creaming, flocculation, and sedimentation by measuring transmitted light (T) at 0° and backscattered light (BS) at 135°. The accuracy of these measurements depends on clear, interference-free optical signals from the sample. A well-formed meniscus is essential for obtaining reliable and reproducible data.
1. What is a Meniscus?
The meniscus is the curved surface that forms where the liquid meets the air and the glass wall of the vial, due to surface tension. In BeScan analysis, this is usually a concave meniscus, as illustrated below:

Concave meniscus
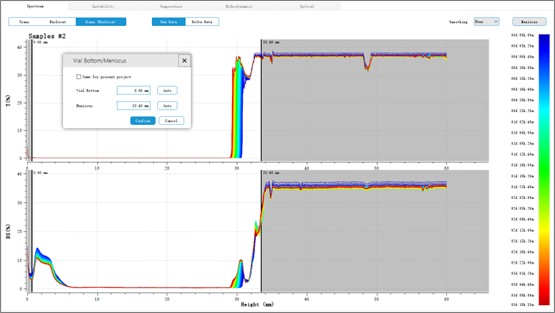
In the BeScan software, signals from non-sample regions—specifically the bottom of the vial and the area above the liquid (including the meniscus)—should be are excluded from analysis to avoid interference, as shown:
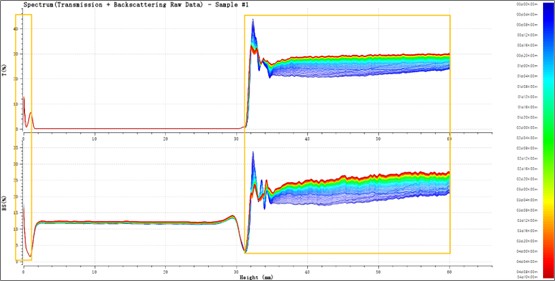
Excluded areas highlighted
A clear, smooth, and stable meniscus is therefore critical for defining the analysis zone and ensuring data accuracy.
2. What Does an "Unacceptable" Meniscus Look Like?
The following are common examples of poor meniscus quality. These should be identified and avoided after sample preparation:
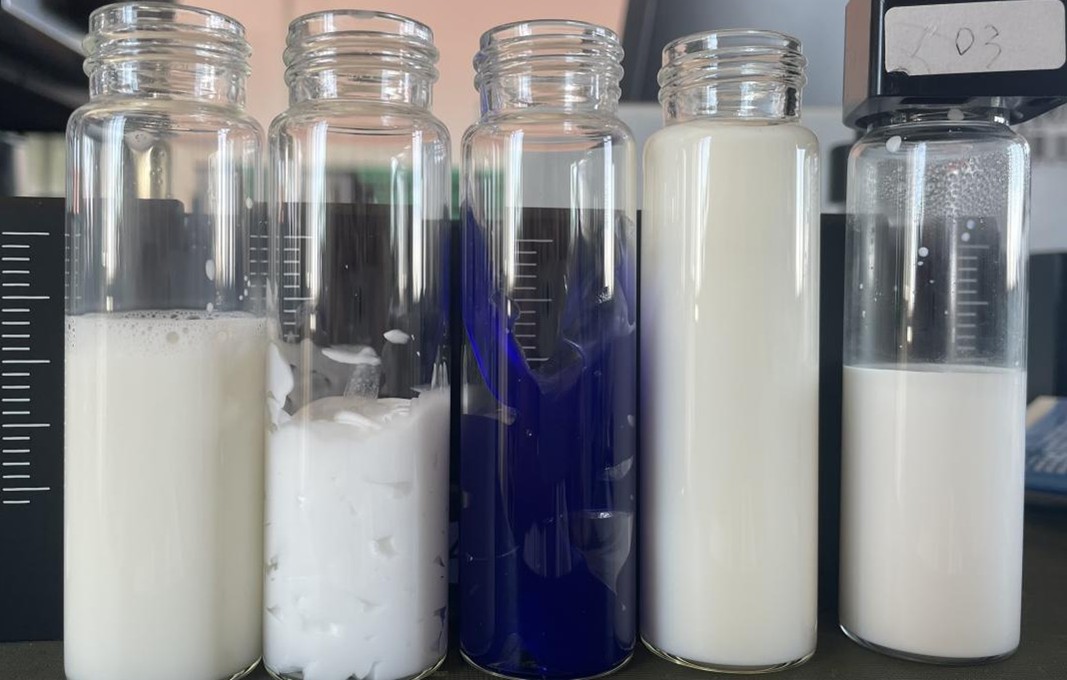
with bubbles, uneven, clinging to the wall, overfilled, good meniscus
- Uneven or irregular meniscus: A wavy or distorted surface, often due to fast or forceful dispensing.
- Meniscus with bubbles: Bubbles trapped at the surface can disrupt light transmission and backscattering and detection.
- Meniscus clinging to the wall: The liquid is higher on one side, usually from tilting the pipette or touching the vial wall during dispensing.
- Overfilling: Excess liquid can raise the meniscus beyond the instrument’s detection range, preventing analysis of the top layer.
3. How Does a Poor Meniscus Affect BeScan Results?
A poorly formed meniscus can cause optical artifacts and measurement errors, affecting both qualitative and quantitative results
- False signals: Irregularities or bubbles can refract or scatter light, creating "ghost peaks" that may be mistaken for real instability events (e.g., particle aggregation or sedimentation).
- Incorrect instability ranking: If the meniscus shifts downward due to evaporation or temperature changes, the software may interpret this as sample settling, inflating key metrics like the Instability Index (IUS).
- Poor reproducibility: Variations in meniscus shape between replicates can lead to inconsistent IUS values or migration rates, reducing confidence in results.
An unacceptable meniscus can directly introduce optical interference and measurement errors, leading to distorted analysis results and misinterpretation of stability.
4. How to Avoid a Poor Meniscus
Follow these practical steps to achieve a clean, consistent meniscus every time:
- Use proper pipetting technique:
· Dispense slowly and steadily to avoid splashing or bubble formation.
· Hold the pipette vertically and avoid touching the tip to the vial wall.
- Use the recommended sample volume (e.g., 20 mL) to ensure optimal meniscus position.
- For viscous samples: If the surface remains uneven after pipetting, use brief, low-speed horizontal centrifugation (≤5 min) to level it.
- Always inspect the meniscus before loading the vial. If imperfections are visible, prepare the sample again.
Rate this article
Share On


